How to Clean the Particle Filter and Catalytic Converter of a Vito | Step-by-Step Guide

Aya Benhalou
Aya Benhalou
<  BACK
Maintaining the particle filter and catalytic converter is essential to ensure optimal engine performance and reduce harmful emissions. Over time, these components can become clogged with soot and residue, affecting their efficiency. This step-by-step guide on how to clean the particle filter and catalytic converter of a Mercedes-Benz Vito will help you clean them correctly.

How to Clean the Particle Filter and Catalytic Converter of a VitoBefore you begin the cleaning process

Before starting the cleaning process, make sure the vehicle is parked on a flat and stable surface, with the engine completely cool. For the cleaning process, you will need the Oxyhtech DPF Cleaner machine, a detergent, and the necessary tools to remove the particle filter and catalytic converter. Wear protective gloves and safety goggles to avoid exposure to harmful residues. If necessary, use a jack and safety stands to lift the vehicle and access the exhaust system more easily. Verify that all equipment is functioning correctly before proceeding with the following steps.

What You Need for the Cleaning Process of the Particle Filter and Catalytic Converter 

To effectively carry out this cleaning process, you will need the Oxyhtech DPF Cleaner, specifically designed for deep cleaning of diesel particulate filters and catalytic converters. You will also need Detergent for DPF CLEANER and clean water to rinse and soak the components, as well as safety equipment such as gloves and goggles to protect yourself during the process.

How to clean the Particle Filter and Catalytic Converter Video

Step-by-Step Guide to Cleaning the Particle Filter and Catalytic Converter

Step 1: Remove the Vehicle’s Catalytic Converter to Clean It

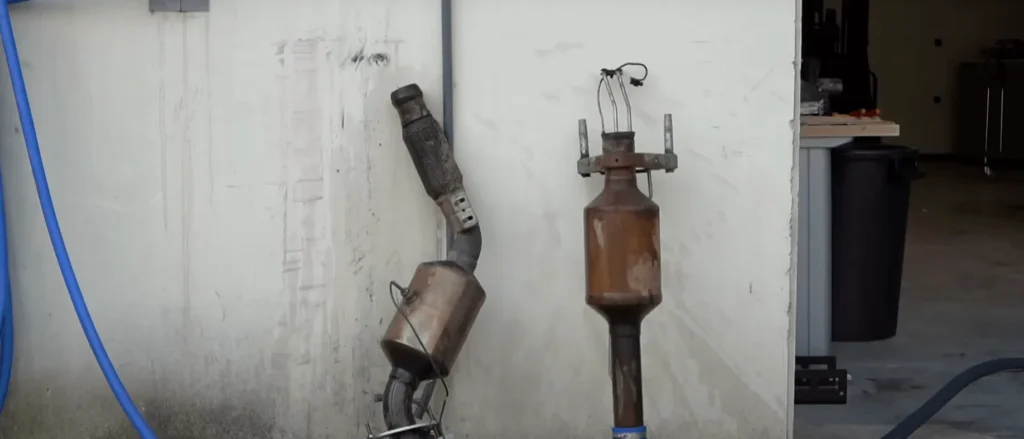
To begin, locate the catalytic converter underneath the vehicle. Use a wrench set to loosen the clamps and bolts that hold it in place, then carefully disconnect any attached sensors. Once removed, place it on a clean surface for cleaning.

Step 2: Remove the Vehicle’s Particle Filter to Clean It

Next, locate the diesel particulate filter (DPF) and follow a similar process to remove it. Loosen the necessary bolts and clamps, disconnect the sensors, and carefully remove the filter. Place it on a stable and clean surface to prepare it for the cleaning process.

Step 3: Preparing the Particle Filter for Cleaning

Connect the adapter of the Oxyhtech DPF Cleaner to the exhaust outlet of the particle filter. Place the plug on the adapter, fill it with water, and then remove it. Connect the pressure sensor and supply air. Once everything is ready, press the start button to launch an air blast through the filter. When the process is complete, disconnect the machine’s hose and replace the plug in the filter.

Step 4: Soaking the Particle Filter

Add ¼ liter of Detergent for DPF CLEANER inside the particle filter and fill it with water. Let the filter soak for an hour to help break down stubborn carbon deposits.

Step 5: Connecting the Adapter to the Catalytic Converter

After preparing the DPF, attach the cleaning adapter to the catalytic converter. Ensure a secure connection before proceeding with the next step.

Step 6: Soaking the Catalytic Converter

Pour ¼ liter of Detergent for DPF CLEANER into the catalytic converter and fill it with water. Let it soak for an hour, allowing the cleaning solution to dissolve built-up carbon and residue inside the component.

Step 7: Draining the Cleaning Solution from the Particle Filter

Once the soaking process is complete, drain the cleaning solution from the particle filter and the catalytic converter.

Step 8: Connecting to the DPF Cleaner and Starting the Cleaning Process

Finally, reconnect the particle filter to the DPF Cleaner and start the cleaning process. This will remove any remaining contaminants and restore its optimal performance. Once the cleaning cycle is complete, proceed with the same process for the catalytic converter. Once finished, reinstall the filter and the catalytic converter, ensuring that all connections are properly adjusted.

Step 9: Measuring the Airflow for the Second Time

After completing the cleaning process, measure the air pressure again to verify that everything is functioning correctly. Ensure there are no blockages or irregularities before continuing.

After completing all these steps, the car is now ready to function like new. Remember: Regularly cleaning the vehicle’s particle filter and catalytic converter will prevent clogging, improve fuel efficiency, and extend the lifespan of these essential components. By following this guide, you can maintain optimal engine performance and effectively reduce pollutant emissions.  

Contact Us

Request Information or a Demonstration

Do you want to incorporate the best workshop equipment?
Contact us and discover how our technology can transform your business.

Vector (2)

Phone: +34 948 59 74 49

Vector (3)

Location: Polígono Industrial Noáin Esquíroz, Calle J, Nº 2, 31191 Esquíroz, Navarra (España)

    Contact Form

    Leave us your details and you will receive all the information.


    ⚡ REQUEST OFFER ⚡